Plugin Development
Learn how to customize the theme to fit your needs, preview changes and export the plugin.
This is a living document which means it is work in progress, not completed yet and can change at any time while the project is still in development major version zero
0.y.z!
This page documents how to develop the theme plugin — from requirements to the deployment and local installation steps.
Requirements
Download and install IntelliJ with a minimal version of 2019.1 or higher.


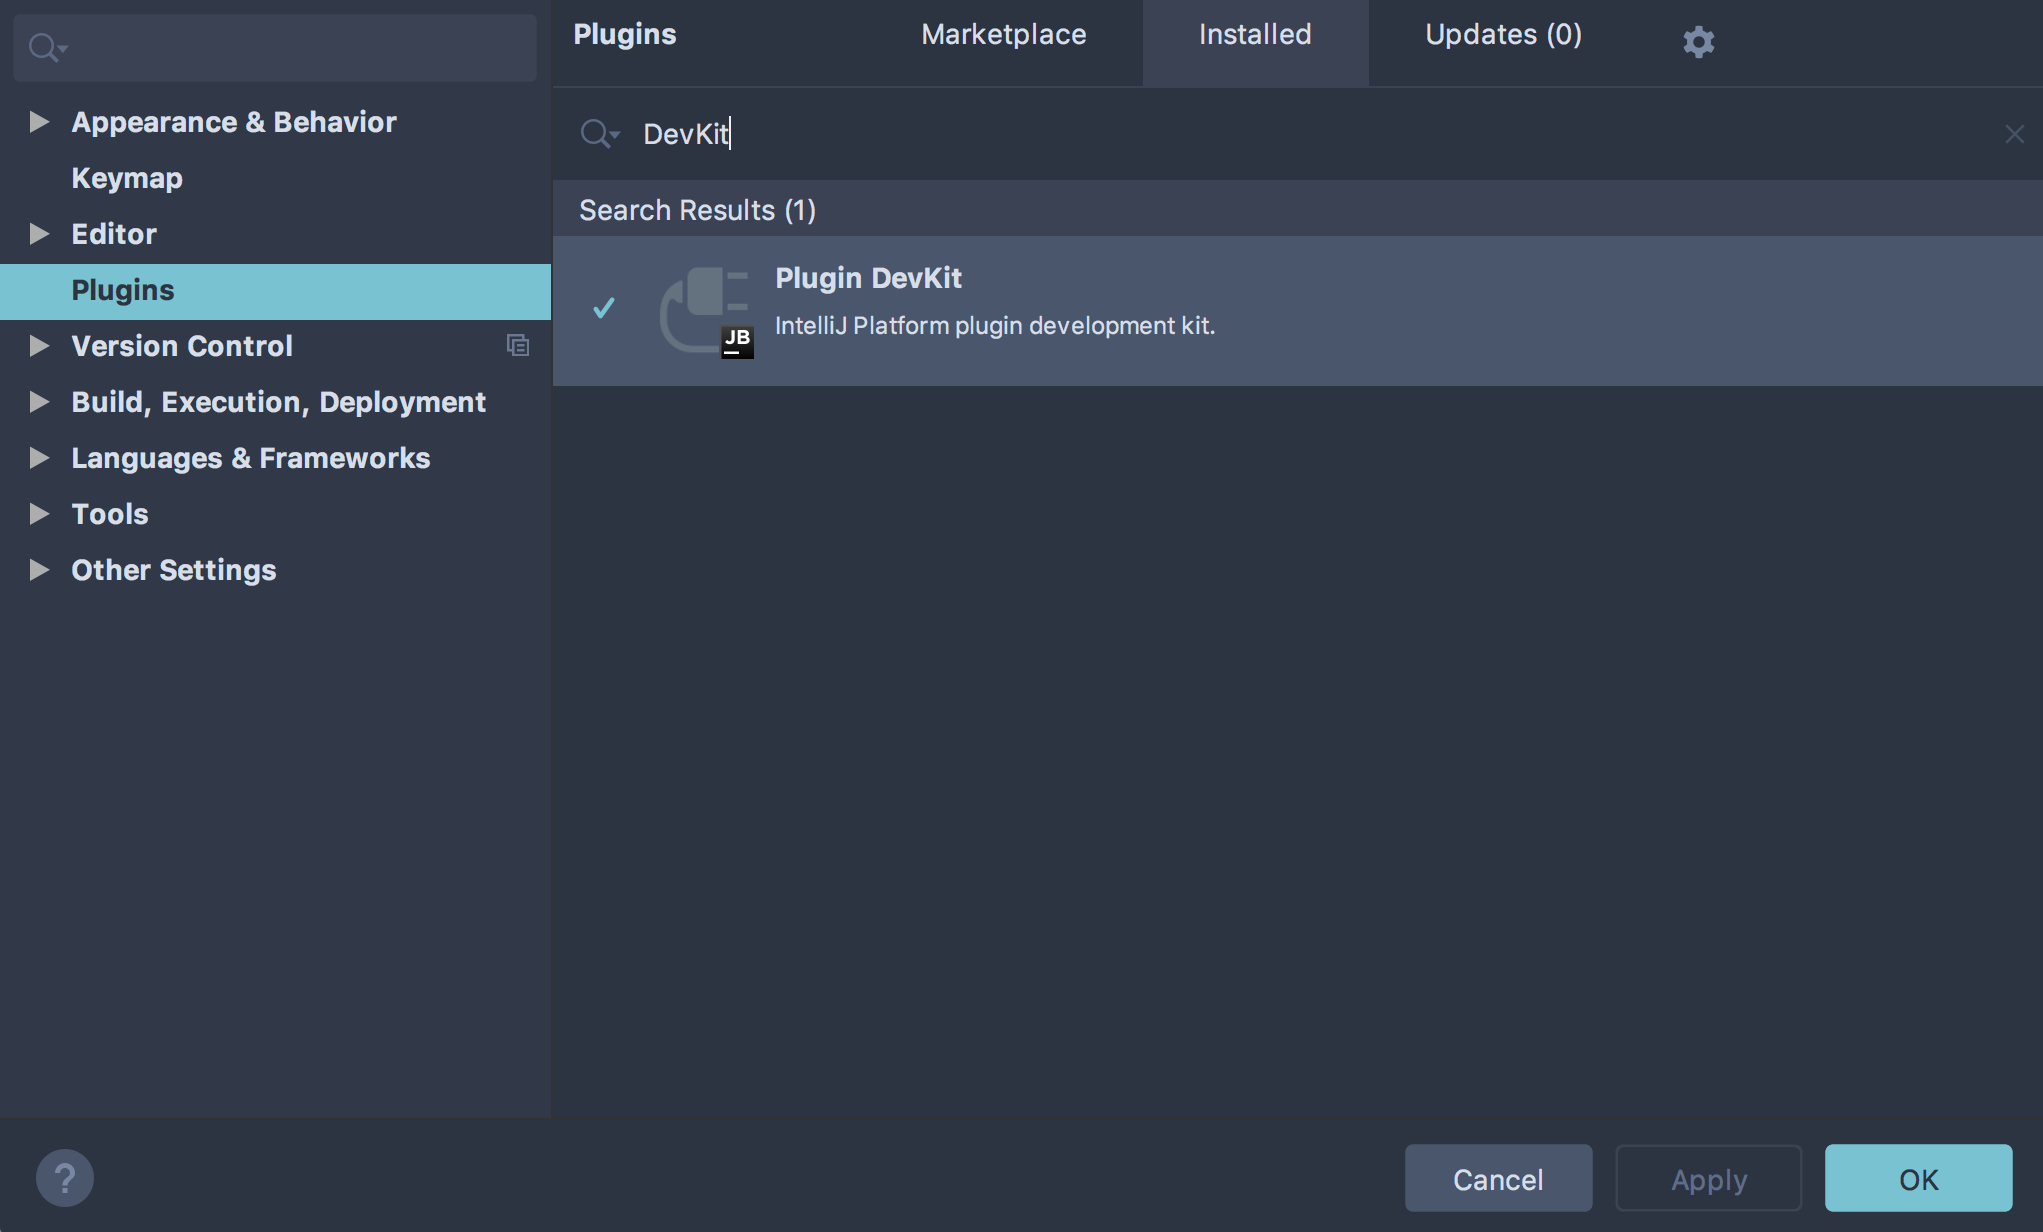
To develop IntelliJ platform plugins the DevKit plugin (bundled by default) must be enabled.

Setup
Download
Clone the Nord JetBrains repository from GitHub to any path:
git clone https://github.com/arcticicestudio/nord-jetbrains.git
To get the project without Git download the project as .zip archive file from the GitHub repository or click on the download button below. Afterwards extract the archive to any path.


Both methods will use the develop branch to work with the latest development state.
Import the project use IntelliJ's Open... wizard from the welcome screen and browse to the path of the cloned/extracted repository.
Development
Workflow
Nord JetBrains follows the official workflow documentation to
- Customize the UI icons and Controls
- Bundle the already existing editor color theme
- Build, debug and test the theme plugin
- Deploy and publish the theme plugin
For details about the general UI design pattern please refer to the JetBrains UI guidelines.
Theme Preview
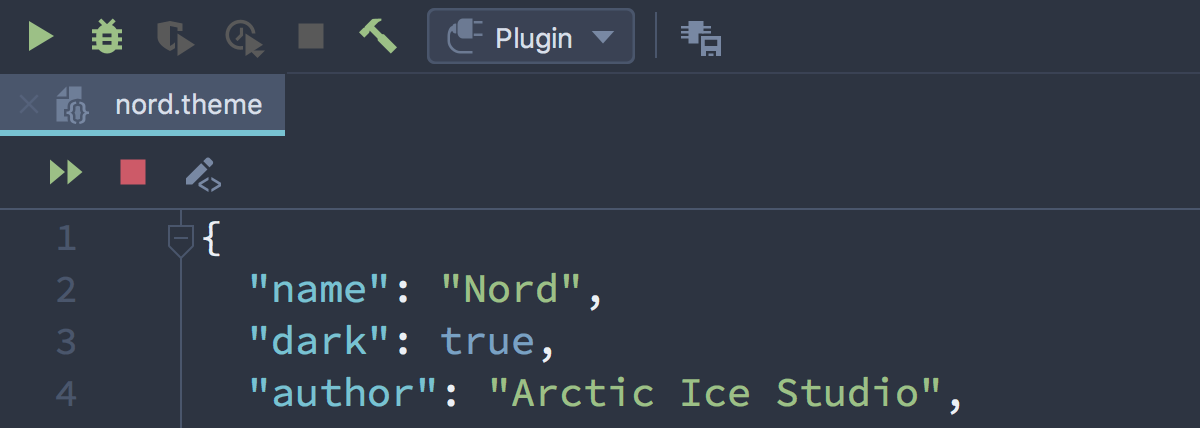
IntelliJ comes with a builtin function to preview the currently opened platform plugin project.
Open the nord.theme.json file and click on the play icon to apply the current state of the UI theme.


To apply changes made while the preview is enabled click on the double play icon and disable the preview again using using the stop icon.

Visual Testing
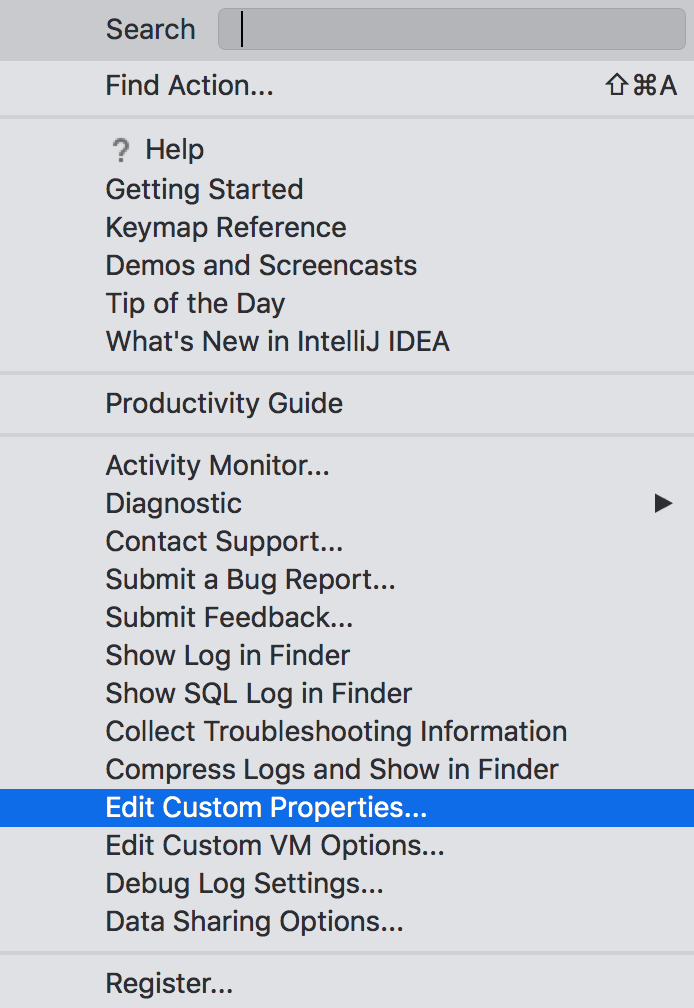
The IntelliJ SDK provides a lot of tools to develop plugins by enabling the internal mode that will allow to show e.g. the LaF Defaults.
To enable the internal mode open the advanced IDE properties and add the following key-value pair:
idea.is.internal=true
Restart IntelliJ to enable the new property.

Deployment
IntelliJ comes with builtin tools to build and deploy plugins.
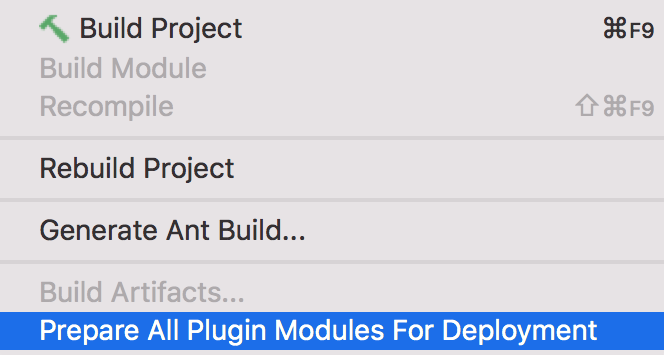
- Go to Build and Build Project to copy the project files to the
/outfolder and generate required metadata. - Again go to Build and choose Select All Plugin Modules For Deployment to generate the JAR file.

Local Installation
A generated JAR file can be locally installed to use the theme without uploading it to the JetBrains plugin repository.
Go to Settings / Preferences ➜ Plugins, click on the gear icon and select „Install Plugin From Disk...“.


Select the plugin JAR file and restart IntelliJ.
Follow the Installation & Activation Guide for more details how to enable the UI theme and editor color scheme.